After the first Article about How to Install a New Blogger XML Templates it's will frustrating to install a new template on your blog if you lose all your widgets. Here's how to avoid this problem and keep your old widgets on the blog when you install new templates. While surf, this solution come to safe your widget, thank to ourblogtemplates.com. So Don't worry, there's no coding involve. You just have to know where to copy and paste codes in your old template into your new template file.
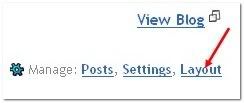
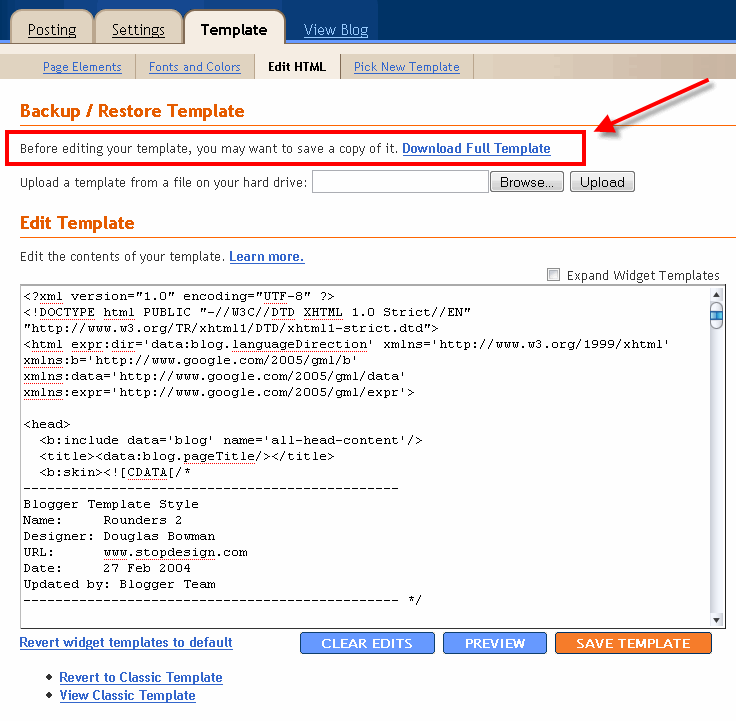
1. Save your current theme first
This is a must. Save the old one first just in case something screws up and you need to get back to the old template.
2. Use a text or code editor
Don't do any coding in the Blogger Editor; it's too easy to mess things up. Get a text editor to do any code tweaking on your computer. If you have no idea what to use, just use Notepad++. Download the latest Notepad++ Installer.exe file. It's free and it makes it easier for you to do your coding.
3. Open up the old and new template XML files in the text editor
Open them up because you'll need to copy some codes in the old template and paste them in the new template files. These codes that you'll copy and paste are basically the codes for your widgets. You don't have to understand what's going on inside the code; you just have to know where it is and what widgets it is for.
4. Find out where the codes are located
Look at the image below. See the <Body> tag? Click on the image to make it larger. All the codes above this tag are mostly CSS, the type of code that controls the appearance (colors, fonts) of your blog. You don't need to copy/paste anything in this section.
The codes below the <Body> tag is the main XML code for your blog. Basically, it's the part that controls the layout (where the sidebars, widgets, headers are) and controls the data flow from Blogger into your blog. This is where all the codes for the widgets you want to save are located.

All your widgets are coded within the tag <b:widget> ... </b:widget>. All the <b:widget> tags must be located within the <b:section> ... </b:section> tag. The structure looks something like this:
The above is a sample code on how a widget code looks like in a template XML file. The main location of the widget is identified with the div id label. In this case, div id=sidebar-wrapper. Below the div id is the b:section tag. All widgets must be located within this b:section tag. You don't need to worry if you don't understand much about the div or b:section thingy. The important tag you have to know is the b:widget tag. Note that you can put as many widgets as you want inside the b:section tags.
Here's an actual example of a widget tag embedded inside a b:section tag. The location is sidebar-wrapper, meaning that the widget is placed inside one of the sidebars in the blog. The widget is an image widget, as you can see it being labeled id='Image1'

The most important thing to note is that the widget code starts with the <b:widget> tag and closed with the </b:widget> tag. This is the single most important thing you have to know when copying/pasting later on.Remember also that the widget is placed after the <b:section> tag and closed with the </b:section> tag.
Here's another example. The widget is a Linklist widget. You don't have to know the codes inside the widget tag because you won't have to change anything in there.

5. Copy and paste the widgets into new theme file
Identify all the widgets you want to keep in your blog after template installation. Locate their codes in the old template file. Remember, these are the codes within the <b:widget> tags and must be close properly with </b:widget>. Copy the codes for a widget that you want to keep and paste them in the new template file, within the <b:section> tags at the location of your choice. Make sure the b:widget and b:section tags are closed properly.
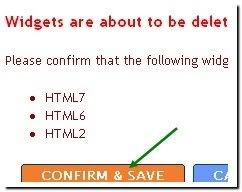
If you don't know the div id location you want to paste them in, just put them in any div id, but must be inside a b:section tag. It'll then show up as a widget in the Layout > Page Elements page (as in the image below) and you can then drag and drop the widgets to any new location.

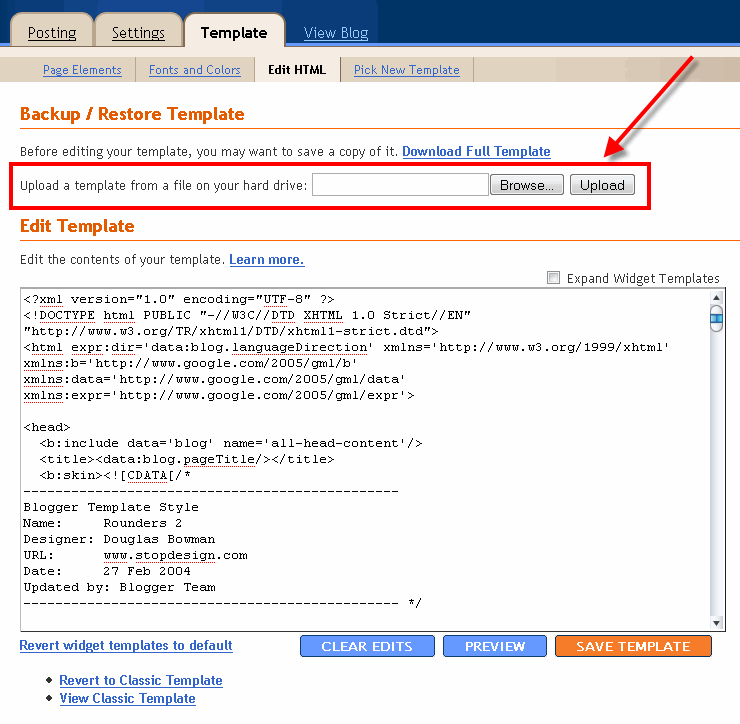
6. Upload the new template as your new blog layout
Once you've pasted all the widgets you want into your new template, upload the new template into your blog using the upload button shown below.

7. If not sure, test this technique on a test blog first
If you're not sure whether it'll work out okay, try it first in a test blog. Create a test blog with a few junk posts (lorem ipsum), create some widgets, and then try changing into new templates using the technique above. See if you can make it work.
Read More..
1. Save your current theme first
This is a must. Save the old one first just in case something screws up and you need to get back to the old template.
2. Use a text or code editor
Don't do any coding in the Blogger Editor; it's too easy to mess things up. Get a text editor to do any code tweaking on your computer. If you have no idea what to use, just use Notepad++. Download the latest Notepad++ Installer.exe file. It's free and it makes it easier for you to do your coding.
3. Open up the old and new template XML files in the text editor
Open them up because you'll need to copy some codes in the old template and paste them in the new template files. These codes that you'll copy and paste are basically the codes for your widgets. You don't have to understand what's going on inside the code; you just have to know where it is and what widgets it is for.
4. Find out where the codes are located
Look at the image below. See the <Body> tag? Click on the image to make it larger. All the codes above this tag are mostly CSS, the type of code that controls the appearance (colors, fonts) of your blog. You don't need to copy/paste anything in this section.
The codes below the <Body> tag is the main XML code for your blog. Basically, it's the part that controls the layout (where the sidebars, widgets, headers are) and controls the data flow from Blogger into your blog. This is where all the codes for the widgets you want to save are located.

All your widgets are coded within the tag <b:widget> ... </b:widget>. All the <b:widget> tags must be located within the <b:section> ... </b:section> tag. The structure looks something like this:
<div id='sidebar-wrapper'>
<b:section class='sidebar' id='sidebar' showaddelement='no'>
<b:widget id='LinkList1' locked='true' title='Linkbar' type='LinkList'>
...
... some additional codes here ...
...
</b:widget>
<b:widget id='HTML1' .....;
...
</b:widget>
<b:widget id='Image1' .....;
...
</b:widget>
</b:section>
</div>
The above is a sample code on how a widget code looks like in a template XML file. The main location of the widget is identified with the div id label. In this case, div id=sidebar-wrapper. Below the div id is the b:section tag. All widgets must be located within this b:section tag. You don't need to worry if you don't understand much about the div or b:section thingy. The important tag you have to know is the b:widget tag. Note that you can put as many widgets as you want inside the b:section tags.
Here's an actual example of a widget tag embedded inside a b:section tag. The location is sidebar-wrapper, meaning that the widget is placed inside one of the sidebars in the blog. The widget is an image widget, as you can see it being labeled id='Image1'

The most important thing to note is that the widget code starts with the <b:widget> tag and closed with the </b:widget> tag. This is the single most important thing you have to know when copying/pasting later on.Remember also that the widget is placed after the <b:section> tag and closed with the </b:section> tag.
Here's another example. The widget is a Linklist widget. You don't have to know the codes inside the widget tag because you won't have to change anything in there.

5. Copy and paste the widgets into new theme file
Identify all the widgets you want to keep in your blog after template installation. Locate their codes in the old template file. Remember, these are the codes within the <b:widget> tags and must be close properly with </b:widget>. Copy the codes for a widget that you want to keep and paste them in the new template file, within the <b:section> tags at the location of your choice. Make sure the b:widget and b:section tags are closed properly.
If you don't know the div id location you want to paste them in, just put them in any div id, but must be inside a b:section tag. It'll then show up as a widget in the Layout > Page Elements page (as in the image below) and you can then drag and drop the widgets to any new location.

6. Upload the new template as your new blog layout
Once you've pasted all the widgets you want into your new template, upload the new template into your blog using the upload button shown below.

7. If not sure, test this technique on a test blog first
If you're not sure whether it'll work out okay, try it first in a test blog. Create a test blog with a few junk posts (lorem ipsum), create some widgets, and then try changing into new templates using the technique above. See if you can make it work.


